google.com, pub-8985115814551729, DIRECT, f08c47fec0942fa0 Free Printable Lesson Plans

Book BAGS: preschool book-based activities, games and snacks for "Blueberries for Sal"


Hello friends! Teacher Omi (grama) here. As a former homeschool parent and special needs teacher, I'm excited to bring this passion for education forward to the next gen grandchildren. When he was 4, my eldest grandson Silas called me Teacher Omi (grama) so I'm calling this new phase of homeschooling our Om-school.

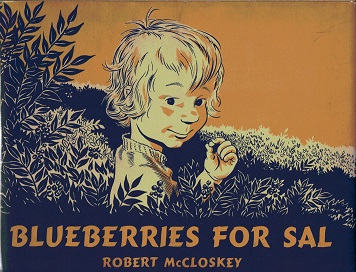
I've been putting together a series of Book BAGS (literature-based units with books, activities, games, snacks and crafts). Today's Book BAGS unit is based on the 1949 Caldecott winner "Blueberries for Sal" by Robert McCloskey. My mom read it to me when I was 4 and it's become a family favorite. We also live in Michigan blueberry country and it's coming on blueberry season, so a perfect story to celebrate. I've geared this to homeschooling, erm, Om-schooling families with activities for all ages. If you're using in a group setting, preschool to 2nd grade would be best. I'm dedicating these free printable bear lesson plans and activities based on "Blueberries for Sal" to our grandboy Lucian, bear aficionado and explorer extraordinaire. 

Begin your Book BAGS unit by reading "Blueberries for Sal." Enjoy the beautifully detailed block print illustrations of Robert McCloskey.  I recommend getting your own copy of this classic story and Thriftbooks is my go-to for reasonably priced used books. 

Note the similarities between the bear cub and his mother and Sal and her mom. Both moms are preparing for winter. Sal's mom is going to can the blueberries while Little Bear is exhorted to "eat all you can hold for winter." "Blueberries for Sal" is the perfect segue into life science lesson plans on bears and hibernation. Bear.org has a plethora of free printable bear lesson plans and activities based on bears. 

You might actually do a fruit canning project with children. Or if you're like me and not much of a home-canner, make freezer blueberry jam. Here's a freezer blueberry jam recipe from Farmhouse Harvest. Jam-making lesson plans are perfect for multiage classrooms or homeschools because everyone from the baby on up can participate. Toddlers like my Omschool littles Remus and Emmett could practice eye-hand coordination and fine motor skills placing canning jar rings on a spoon (as Sal does) while the prechoolers Juno and Ezra could be blueberry stem removers and squashers. The 4 and up crowd (Lu Bear, Milo, Lola) can get math skills practice measuring and counting. The big Kahunas like our Moses and Silas can be project coordinators. And everyone will enjoy the tasting! 

If you don't want to mess with making jam (and I confess I for one might not LOL), you can make a multitude of snacks from blueberries for your unit. How about rainbow sandwiches? Spread bread with cream cheese, slice strawberries, mandarin oranges, bananas, green grapes, blueberries and red grapes and arrange like a rainbow! Or make Super Berry Chicken Salad with cubed chicken, celery, green peppers, blueberries, cashews (or chow mien noodles) mayo and Dijon mustard. Lots of slicing and chopping for cooking skills practice. Or you could do blueberry muffins or pancakes. 

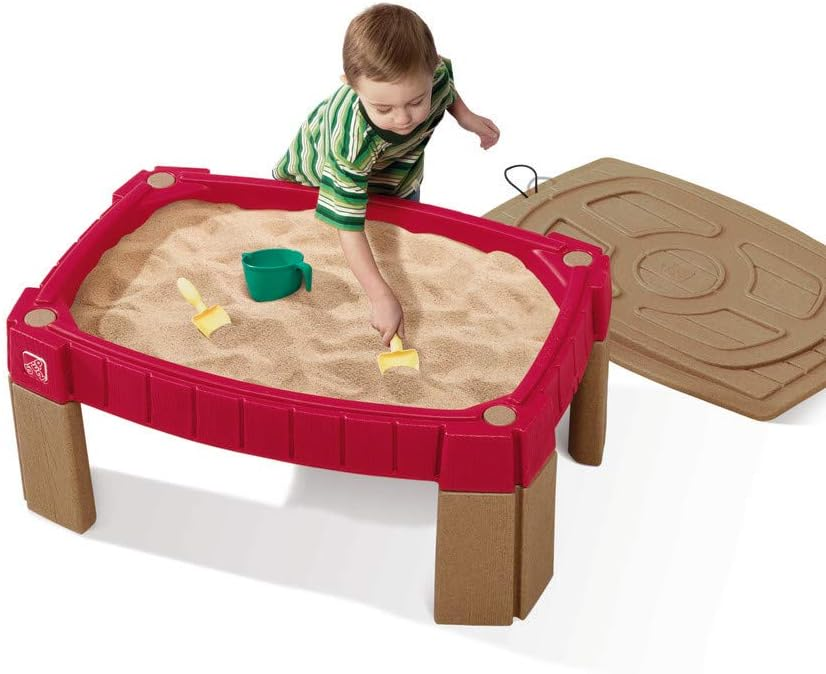
Grade one and up might also discuss how things have changed in Sal's 1948 family kitchen and what things have remained the same. Stoves for example look much the same but are fueled differently (discuss how). You might assemble a collection of "vintage" cooking utensils like a rotary hand beater, potato masher, metal cookie cutters, flour sifter and pastry dough cutter. Put these in the  sand and water table for exploration. 

A perfect game for "Blueberries for Sal" Book BAGS (bags is book, activity, game and snack) is clothespin drop which lets kids explore another old-time tool, clothespins. This was a favorite at birthday parties when Omi was young. All you need is a package of clothespins and a canning jar. Students practice eye-hand coordination and fine motor skills dropping pins in the jar. 

And for the activity or book-based craft, make clothespins into "puppet" characters from "Blueberries for Sal" and act out the story. Here's where that recycling bin I'm always on about is invaluable. Let kids forage for scraps from there and a fabric scraps bag, to clothe and fur the characters. No fur fabric for the bears? Just draw on brown paper bags! Then add faces and voila, your own puppets! 


Free cross-curricular real-life lesson plans and building projects

Hello and welcome to the Omschool! Teacher Omi (Grandma) here with more ways to get free lesson plans from everyday tasks. A good curriculum should be practical, hands-on, goal-oriented and feature real-life. activities. Today's free lesson plans come from building/ assembly projects for household materials. These do double duty in that students are creating real-life items they will use everyday and homeschool families get value added being able to cross one more project off the to-do list! Assembling building projects is cross-curricular, requiring STEM, math, tool use, fine motor, reading, following directions, process thinking and often problem-solving skills (plus probably others I've not thought of!) 

So what kind of building projects are we talking about? Well, most of us order a lot of things online and have them shipped. And even if you purchase in store, many items come in pieces and must be assembled. Furniture, shelves, containers, toys, decorations, you name it...most everything states some assembly required. And these assembly building projects make excellent free printable STEM lesson plans for students. Next time you buy something that comes in pieces, students to building projects. Usually, you don't have to write separate lesson plans or even provide materials! Everything comes right in the package! And if instructions aren't written as well as they could be, this is extra learning as students are required to "think outside the box" and come up with solutions.  What better problem-solving activities could there be?

Oh and even more value added if instructions are written in several languages. Students can learn to translate and compare words in different languages. You might have them make a chart of how different phrases, words, materials or processes are called in various languages. I suggest making photo copies of instructions for each student involved in the projects. 

The building projects example I'm using is this desk I built (or assembled) recently. Everything was labeled, parts by number and hardware by letter. The step-by-step instructions were wordless and showed pictures. Most steps were very clear but the keyboard tray assembly was not. I had to redo it several times till I got it right. The set came with tools so I had everything I needed. I would recommend using your own if possible. We used our power drill which made it easier. Older kids could be taught to utilize one if available. Let children discuss how to organize materials for easier construction (placing parts in numerical or alphabetical order). For building projects with many different fasteners, students might sort them into an egg carton. Be sure to save little zippered bags from fasteners for other repurposed uses. Also, save any spare parts in case something breaks. 

Here's a site with free printable paper buildings and structures for further STEM extension. Some of the free printables aren't working anymore (this is a really old site I used 15 years ago when I was writing lesson plans for Yahoo!) But there are enough to provide lots of printable activities and hours of learning. Stay tuned for more free printable lesson plans. 

Cats Mordecai and Moishe (not shown) were very helpful in the building project and Mord thought you would like to see him sitting on his handiwork!  


Make a pet baby tornado: fun, easy, free science activities and recycled crafts

 Hello teachers and homeschool friends, "Omschool" teacher Omi (grandma) here with easy, free recycle bin crafts for science lesson plans. Today we're making pet baby tornadoes. This science experiment is easy for all ages from toddler on up. It's perfect for a highchair craft. The pet baby tornado is free to make with items from the recycle bin. You just need water, a clean glass jar with lid and a tiny drop of dish soap. 

To find baby tornado, just shake round and round to create a swirling in the water, called in science talk, a vortex. This is the force that drives a whirlpool and also the force that is generated by the drain in your sink or bathtub. Water doesn't just fall down the drain, it swirls round and round as it goes down. 

I realized after I made my pet baby tornado video that it was difficult to see him clearly. So I tried adding a little food coloring to make baby tornado show up better. You can also add some glitter if you  have some, to show how things floating on the surface are pulled into the vortex. 


Extend your science fun with some cross-curricular connections. Make a book about baby tornado. Research tornados and the force they create. Draw your tornado and maybe make up a song about him (her!) 

Here are free printable tornado lesson plans from A to Z Teacher. And here are some more free printable tornado lesson plans from Teach Engineering. 


Homemade sand and water table fillers for preschool learning centers


Hello Omschool blog friends! Teacher Omi here with another post in my series on the venerable preschool sand and water table. What's a sand and water table (also called sand table)? It's a low child-sized table with tubs that can be filled with materials for children to explore. The sand table is the backbone of preschool science activities in learning centers. Early childhood special education classrooms use a sand table for hands-on, sensory, tactile stim and interactive lesson plans to build cognitive and perceptual development. 

In my previous post, we looked at sand table alternatives to the expensive models in many preschool learning centers. These homemade sand tables feature repurposed, recycled and reused materials. Select the best sand and water table alternative to fit your classroom or homeschool needs, Then use these sand table fillers in science activities for early childhood lesson plans.

Water: Fill tubs with water to make a water table. Add floating toys and bath tub toys. Here are free printable lesson plans to make homemade water and sand toys from your recycle bin. Provide different sized containers that encourage children to practice pouring and measuring. Place revolving water wheels in the water table. Add some items that sink and some that float. Use water table for hands-on exploration with the scientific concepts of flotation, water displacement, density and specific gravity. Create a "Does it sink or float?" chart. Here's a free printable chart

Bubbles: Make a simple bubble solution with water, lemon Joy dish soap and glycerin for sturdy bubbles. Add bubble making toys and every day household gadgets: apple corer, egg beater, whisk, egg slicer, slotted spoon, fork, cone shaped applesauce mill and any other safe gadgets for water science activities in learning centers.

Rocks and seashells: Fill your sand table with water and sand. Add rocks, seashells and old (sanitized) recycled toothbrushes. Children can scrub shells and rocks with toothbrushes. Shells and rocks are best seen in water, which brings out their hidden depths. Children will love exploring the intricate beauty of shells and rocks.

Shaving Cream: Allow children to squirt shaving cream into water table tub. Concentrated gel shaving cream is lots of fun because it foams up as it sprays. Teach safety so kids don't get soap in their eyes. Exercise caution with aerosol cans. It may be advisable to have an adult add the shaving cream. Encourage finger painting and drawing in shaving cream. Make sure children wash their hands after doing science activities in learning centers.

Snow: Fill the sand table with snow and add plastic sand shovels, trowel, ice cream scoop, melon baller, recycled plastic cups and containers for molding and shaping snow. Have children to wear gloves and keep several pairs near the water table.

Recycle bin paper scraps: Place scrap paper in sand table tubs and add scissor with patterned edges and paper punches. Children love to snip, trim, cut and punch paper. Exploring with paper in the sand table keeps scraps in one place. This exercise provides good practice in cutting skills, scissors skills, eye-hand coordination and fine motor skills.

Dried beans or rice: Add plastic measuring cups, spoons and cups with pour spouts. Teach children about measurement math. Preschool children can practice counting, sorting while getting good tactile stimulation in learning centers.

Aquarium Fish tank rocks: Buy bags of multicolored aquarium fish tank rocks (the small kind that line the bottom of the tank). Fish tank rocks make excellent media for pouring, scooping and measuring. Aquarium rocks also don't draw insects like beans and rice. Beads work well in the sand table, too, but can be expensive. Explore other materials for your sand table science activities.

Picture is a very special grandson, mucking about with his homemade silly putty! 


DIY Sand and Water Table alternatives for homeschool and classroom


 Hello fans of my Omschool blog. I've been a licensed general and special education teacher for 37 years and part of my career work was spent homeschooling our four children. Now, I'm Omi--grandma--to 9 going on 11 and am continuing the homeschool traditions I began, with the second generation as Omschool (Omi's school). Lesson plans are designed with cheap to free materials, many of which are reused, repurposed and recycled. 

For today's lesson plans, we'll create a DIY sand and water table for preschool, special education and lower elementary learning centers. This sand table alternative was developed in our homeschool and works well for small spaces. As budgets are usually tight, whether in public, parochial or homeschool, this is a low cost alternative as well. 

Instead of the expensive sand and water table purchased from school supply companies, I've used a repurposed child's sandbox such as the enclosed Little Tikes turtle sandbox or Step 2 brand sandboxes. The turtle sandbox is washable, portable and covered. It moves easily indoors or out. For an even more budget friendly alternative, get a small plastic wading pool. I've found these as cheap as $7 from Dollar General. Inflatable kiddie pools will work too however they aren't as durable. 

The last sand table alternative is a low sided plastic box or tub with lid. This works very well when space is limited. When learning center activities are done, simply close the box with media and manipulatives inside and stack in the storage area. Here's my blog post on homemade sand toys for the sand table. 

These preschool learning center activities worked very well for our homeschool. I could allow the  youngest children to explore independently while instructing the older children. The DIY sand and water table wasn't just for preschool learning center activities either. The older kids could use it to practice and explore mathematical concepts such as measurement, geometry (volume) and science (sing various media). Sand tables provide excellent sensory experiences. More on sand table filler alternatives later! 

I'm sorry I don't have an image of how this sand and water table fit in our homeschool. But let me assure you the even in our tiny 10x10 room, it fit well! I've linked the picture to Amazon. This small reasonably priced Step 2 sandbox would work perfectly. 

Free lesson plans: how to homeschool for nothing (zip, zero, no cost)


 Hello my friends! Om-school Omi here with some good...nay great...news for homeschool families. You can literally homeschool your children for nothing, as in zip, nada, zero cost with these free lesson plans and a little know-how. I'm going to share easy, free ways to educate kids, gleaned from 43 years of teaching. 

I've been doing this education thing in one way or another since I was 15, at summer camps, VBS, Sunday school and then as a certified teacher in K-8, Montessori, adult, preschool, special needs, tutoring, homeschool and substitute teaching. And I can assure you that it's not really that difficult if you plan and prepare accordingly. 

If the Covid 19 pandemic taught us anything about homeschooling our children it's that we prefer to pay for things (or feel more comfortable with purchased curriculum, cyberschooling, apps, etc.) than we do trusting our own teaching skills and common sense. But happily, as quarantine wore on, I saw many parents begin to have aha moments as they realized, hey, this isn't so difficult. We can teach our kids! To quote my beloved Barack Obama, yes we can! Parents began to wean from purchased packaged and digital lesson plans and experiment with ideas of their own. 

So now that Covid 19 is winding down, you can also keep up that momentum with homeschooling if you want. You don't have to homeschool every day or keep them out of group education. The key is to remember that every moment we are with our children we are teaching, modeling, and communicating in every act we perform or word we say. Daunting? A little. But also exciting. So how do we teach, model and communicate positive healthy, proactive ideas to our kids? Here are some ideas, my "free lesson plans" if you will. 

1) Be authentic. Just because we are educating constantly, doesn't mean we have to adopt a fake "teacher voice." Educating doesn't mean pontificating, preaching or proselytizing. Speak to children respectfully, positively and gently. 

2) Build for natural learning. Teaching is more about doing and showing than talking. St. Francis of Assisi said of preaching (which in its truest form is teaching) "preach always. Occasionally, use words." Genuine learning takes place when teachers share, foster and facilitate experiences. 

3) Facilitate. Montessori identifies this as the teacher's main duty. Make natural learning experiences accessible to students. Create activities--a craft project, for example--and then step back and let children interact with materials. Or just point out learning experiences (a bird's nest on a nature walk). Don't hover, orchestrate or  manufacture results. Let kids take from experiences what they will. See my post on grandchildren Lucian and Ezra and their experiences with a sand mold project we did with them. 

4) Observe. I can't emphasize enough the importance of quiet observation and reflection in the classroom. In an upcoming post I'm going to cover observation journals. There's so much going on around us in our world. Children know this and are constantly making us adults aware of this, if we listen. Sometimes, we learn more from them than they learn from us and what a blessing that is. I guess that's why Montessori says to "follow  the child" and the Bible that "a child will lead them." 

5) Empower. Sadly some children have had their experiences, observations and ideas diminished and need an infusion of confidence. They have come to believe that they aren't good enough and require constant validation from someone they think is superior. This is where we educators can interrupt and redirect that cycle and validate them. When subbing in an alternative high school for troubled teens, students were reading "The Crucible" aloud as a play. I complimented one young man who was generally very angry and withdrawn, on his delivery as Judge Hawthorne. I said he should consider community theater. He literally blossomed and I heard him after class telling students that he was thinking of trying out for a play. 

Stay tuned for more ideas on how to educate children without spending a cent! Photo is eldest grandson Silas mucking about with his homemade slime, making a mess, having a blast, oh and btw, learning about polymers. 

How to Adapt Lesson Plans for Multiple Ages

 Greetings from the Om-School! Teacher Omi (grama) has been lucky to spend more time with the grandkids lately and it's got me thinking again how important it is, not just in homeschool, but in any educational setting to tailor lesson plans to various ages and ability levels. Two things you want to avoid when doing activities with kids is boredom and planned failure. And activities that are geared to young or too old will cause both of those. But age-flexible lesson plans will automatically provide the opposite: engagement and success. 

I know you may be thinking, but I don't have time to create separate lesson plans for every age or ability level that I'm teaching. Good news! You don't have to. Here's how to adapt lesson plans for multiple ages. You may have noticed that the lesson plans on this blog are flexible to fit many ages. That's because I want them to be user-friendly for you as the teacher but also for the students who even if they are all the same age, are variable in skill levels. 

The key to age-flexible lesson plans is breaking down the activities and steps involved and then let each child do the part he can have most success with. I'm thinking especially of craft projects here. Too often, children fear crafts because we adults make kids think they have to be done a certain way to "look right." The child fears that he is doing his wrong or that it doesn't look as good as someone else's.

For example, on our recent vacay to visit our six grandkids we made plaster sand molds with them. Children range from baby to age 8. Moses and Silas, the 8-year-olds, could follow the directions to mix up plaster, configure the molds and create their designs. So they were project managers. This gave them a great feeling of success. 

6-year-old Lola was able to follow the directions the boys gave but needed an active duty, to stay engaged. She was the materials coordinator, counting out and distributing what each person would need. 4-year-old Lucian was less interested in the actual craft project part, than he was in the sand play. So we gave him some decorations to place in his mold and then a tub of sand, shells, water and a scrub brush, to explore to his heart's content. 

We helped 2-year-old Ezra and baby Remus make quick hand print molds and let them spend the majority of the time exploring. Ez and Lu built sand castles and had fun burying, digging up and then scrubbing their shells. Baby Remus got some large clean shells to explore. When everyone was done, the big kids joined the littles in seashell exploration.

Everyone got from the project exactly what he or she needed. When focus of an activity is on everyone making a cookie cutter project in the same way, children feel a lot more frustration, boredom and failure. When each is allowed to engage with materials as he feels comfortable, regardless of what the final project looks like, or if, indeed a project is even made, the outcome is authentic learning, success and enjoyment.